
A ComfyUI Alternative With No GPU: Build a Full Brief-to-Ad Pipeline in Your Browser
ComfyUI is the most powerful node canvas and the most punishing to set up. Here is how to build a full brief-to-ad pipeline .. image, upscale, animate, lipsync .. in a browser with no GPU, and the one skill that actually matters: which model to put at each node.
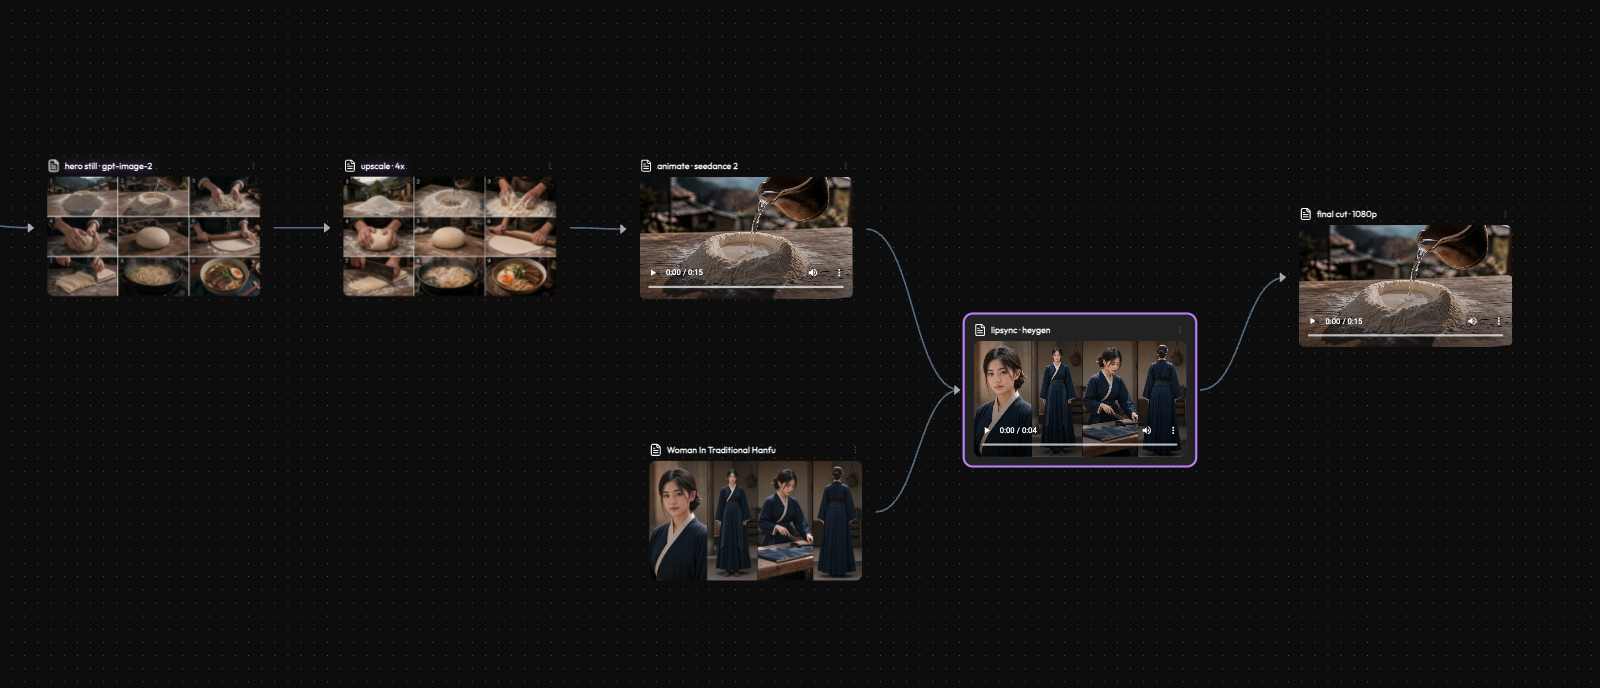
ComfyUI is the most powerful thing you can point at an image model. It is also the place most creatives quietly give up.
Not because the idea is wrong. The node graph is exactly right .. it is the future of how this work gets made. The wall is everything around it: a local Python install, the right CUDA, a GPU with enough VRAM, and then the part nobody warns you about, where a workflow you downloaded from someone smart refuses to open because three custom nodes are missing and two more are the wrong version. You came to make an ad. You are debugging dependencies.
There is a second way to get the node graph without the install. A browser canvas runs the models on someone else's hardware, so "no GPU" is just true, and the only thing you build is the pipeline. This is a guide to building a real one, end to end, and to the single skill that separates a pretty canvas from a finished deliverable: knowing which model belongs at each node.
What we are building
One concrete thing, not a feature tour: a 15-second product ad, assembled node by node.
brief -> hero image -> upscale -> animate (image to video) -> lipsync -> cut
Every box is a node. The art is not in any single box. It is in the choices between them.
Node 1, the still: pick the image model for the job
The first decision sets the ceiling for everything downstream, so spend it well. The question is not "which image model is best." It is "best at what this frame needs."
- If the frame has text on a label, a sign, a UI, reach for the model that holds typography (gpt-image-2 is the one to beat here).
- If the frame is photoreal product or skin, reach for the realism specialist.
- If you are still exploring the look, reach for the fast, cheap model and throw twenty variations at the mood before you commit to one.
A browser canvas lets you put two image models on the same board and run the brief through both, side by side, instead of switching apps and re-describing the scene. Lock the keeper. That single frame is now the source of truth for the whole ad.
Node 2, upscale: only when it earns it
Upscale the keeper, not every draft. The trap is upscaling soft or slightly-off output and amplifying the flaws .. you get a bigger version of the wrong thing. Upscale the frame you have already chosen, and only when the next step needs the resolution. The upscaler is a node in the chain, not a destination.
Node 3, animate: image to video, with the subject anchored
Now bring the still to life. Feed the hero frame into a video model as the first frame so the motion starts from your composition instead of a fresh roll of the dice. This is where image-to-video beats text-to-video for ads: the product already looks right, you are only asking the model to move it.
Pick the video model by the shot, the same way you picked the image model. A clean, must-work clip with sound wants a safe generalist. A hero shot you will edit and sync tightly wants the premium, controllable one. (We ran one brief through all of them and mapped which is for what .. that comparison is its own piece.)
Node 4, lipsync: drive the mouth, avoid the dead eyes
If a person speaks, lipsync is the join. Generate the talking shot, then drive the mouth from your audio track. The giveaway that breaks trust is not the lips, it is the eyes going still and the timing drifting a beat late. Lock the visual identity first, bind speech to it second, and keep the take where the eyes stay alive.
The skill nobody teaches: per-node model choice
Re-read the four nodes. Notice that the hard part was never "how do I use the tool." It was which model at which step, and why. Text frame to the typography model. Hero still to the realism model. Motion to the video model that fits the shot. That decision, repeated down the chain, is the actual craft of a pipeline. Every marketing page that shows you a node canvas skips it, because it is the part that takes a point of view.
When a node breaks, find the node .. don't rebuild the chain
The reason a graph beats a chat box on bad days: when the output is wrong, you can see where. Bad text means the image node, not the video node. Warped motion means the animate node, not the upscale. Fix the one box and rerun from there. You are never starting the ad over because one step misfired, which is the exact thing that makes the local-install workflow so demoralizing when it breaks.
The honest counter-argument
ComfyUI is not obsolete and this is not a takedown. If you want total control, custom nodes, local models, and bit-level reproducibility, and you are willing to own the setup, ComfyUI is unmatched and you should use it. The browser canvas is for the much larger group who want the node graph's leverage without becoming a part-time sysadmin to get it. Power users keep ComfyUI. Everyone who just wants to ship the ad has a real alternative now.
Where this runs
This is the pipeline Vilva is built to hold: a browser node canvas, no GPU, every major image and video model on the same board, and the asset carried from node to node without re-uploading or re-describing it at each handoff. The brief-to-ad example above is a good first build .. it is free to try at vilva.ai (200 credits on signup), and you can reuse the graph for the next product without rebuilding it.
The takeaway
ComfyUI's power and ComfyUI's pain are the same thing: it asks you to own the whole machine. The node graph was always the right idea. You just no longer have to install a GPU to use it.
Stop fighting the setup. Start building the pipeline.